Pages

Showing posts with label crafting. Show all posts

2/13/2014

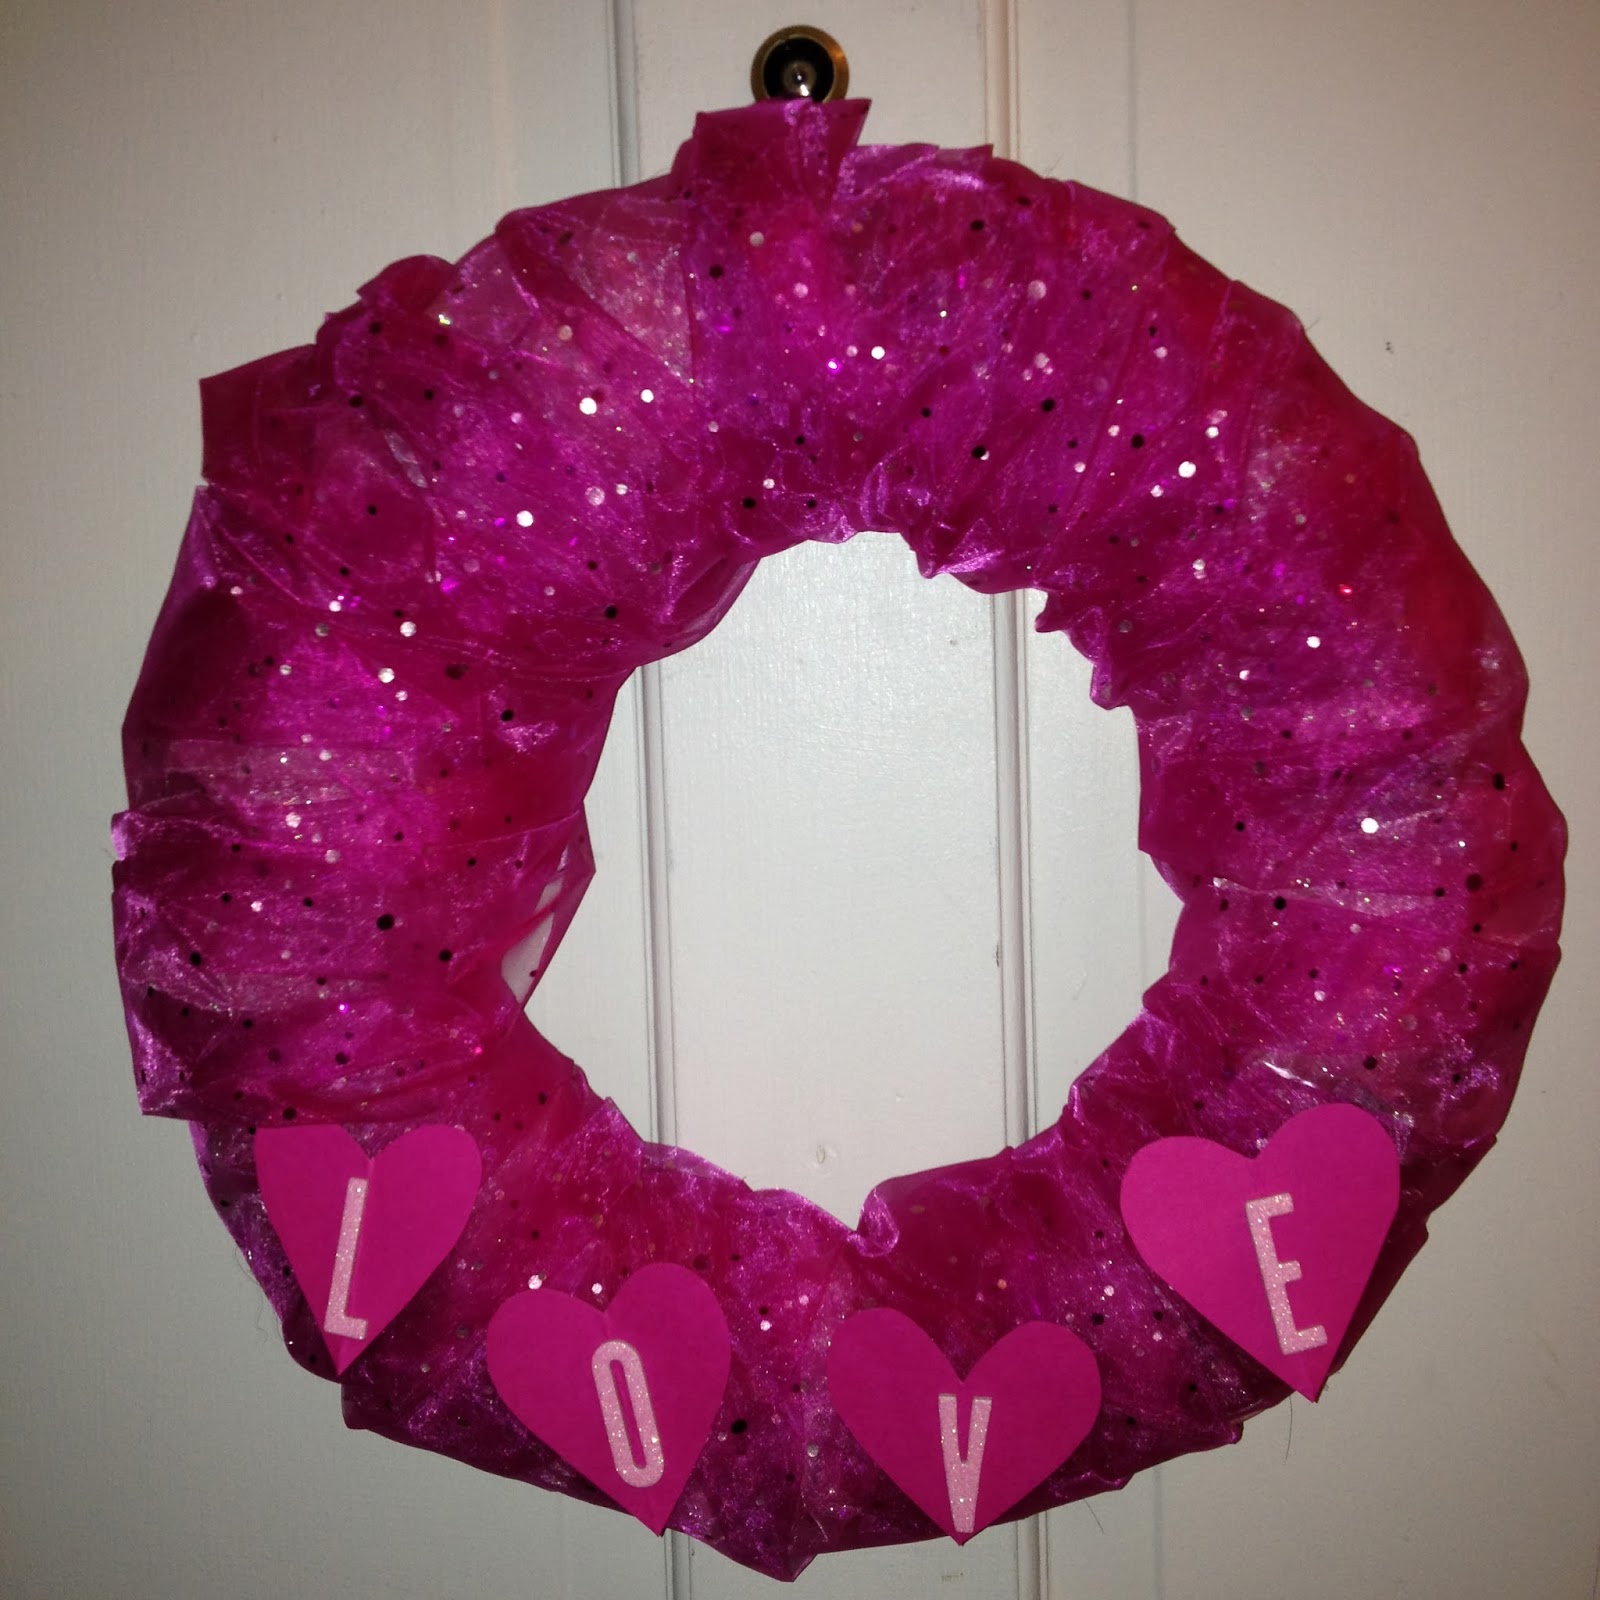
Valentine's Day Tulle Wreath

Valentine's Day will be here in just a few short hours!  Need a last minute decoration?  Check out this easy tulle wreath!  Or, try this style with the next holiday!


Supplies:
2-3 spools tulle (in the ribbon section at Hobby Lobby)
straw wreath form
hot glue gun and glue sticks
1 sheet scrapbooking paper
scrapbooking letters

Directions:
Loosely wrap the wreath with the tulle.  I used about 2 and 1/2 spools of tulle to continuously wrap the wreath to make sure the wreath was fluffy and light.  All ends should be hot glued on the back of the wreath.  I used a small piece of tulle to create a loop on the back for hanging.

Once the wreath is complete, cut four hearts out of your scrapbook paper.  Spell out L-O-V-E on the hearts and hot glue them onto the wreath.

Super easy and cute!  A versatile to boot!

2/12/2014

Plus Sign Quilt

Happy Wednesday!  Hope everyone has having a great week so far!

Last weekend, Troy spent most of Saturday away from the house giving me the opportunity to finish up a couple of quilts and make a new Valentine's Day wreath!  Tonight, I'm delighted to share with you my finished Plus Sign Quilt (check back tomorrow for the wreath!).

Specs:
196 blocks - 5 1/2 by 5 1/2
Finished size 70x70

So over the last couple of years I have acquired quite a few coordinating fat quarters and random end of bolts bundles that I decided would be perfect for a plus sign quilt.  I started out by cutting 196 5 1/2 by 5 1/2 inch blocks and then started organizing the into a plus sign pattern.  Once I got the main portion of the quilt laid out, I added the broken plus signs around the edges knowing I wanted to end up with 14 blocks across and down.  Next, sew the top and you're ready for quilting!  My mom graciously agreed to put this baby on her long arm and gave me lessons on running the machine.  I finally finished up the binding last weekend and its finally complete!


See you tomorrow to show off our Valentine's Day wreath!

12/02/2013

Easy Tie Ribbon Wreath

One more Halloween project and I promise I'll be done until next year!  The great thing about this wreath is you can make it for any season or holiday.  Check it out!

Supplies:
Ribbon - I can't remember how many rolls I used.  Maybe 10?  I way overbought and had to return a ton.  Helpful, I know.
Straw Wreath
Ornament - optional

Directions:
So simple!  Tie strips of ribbon around the wreath until the wreath form is completely covered.  Mix and match the ribbon throughout the process.  If you chose to use an ornament, slip the ornament string over one of the ribbons as you tie it on.  For uniformity, I cut the end of each ribbon at an angle.


11/29/2013

Crafting Update

Hello!  I promised an update on my recent projects and here it is!  I'm sad to say I haven't completed nearly as many projects as I'd like, but I'm trying!  Below are some quilts I've been working on for quite some time.  I'm so thankful for my wonderful mom who has completed all the quilting for me.  She's so talented!

Yellow Love 

Pretty Pinwheels 

Baby and Barnyard

No name, yet.  And not yet quilted.  Soon!

Coming soon: Super Easy Ribbon Wreath!

4/06/2013

Burlap Ribbon Wreath

Looking for a simply door or wall decoration?  Try something like this:


Supplies:
Straw wreath form, with plastic left on
Hot glue gun and glue sticks
Burlap ribbon
Wooden letter
Flower embellishments (found in the scrapbook area)
Ribbon

Directions:
First, glue the end of the burlap ribbon to the back of your wreath form.  Once dry, wrap the burlap ribbon around the wreath form until the wreath is covered.  I needed exactly one roll of the burlap ribbon.  Hot glue the end of the burlap ribbon to the back of the wreath form. 

Lay out your letter and embellishments until you find your favorite layout.  Once you've found the layout of your choice, hot glue the embellishments in place. 

On the back of the wreath, stick your scissors through the burlap making a small hole.  Thread small piece of ribbon and form hanging loop.  Hot glue loop to burlap for extra support.

Once completed, hang in your desired location.  I'm pleased with the results of this wreath.  I've not worked with burlap ribbon before and was slighly nervous as to how it would work with hot glue or how the black would look wrapping the wreath.  But I must say, it looks good!

3/08/2013

Pinwheel Quilt Preview

Happy Friday!  I hope everyone had a great week! 
 
I've spent half of the week at home under the weather.  Not exactly my idea of a good time.  I finally had some energy today, so I started working on a Pinwheel quilt.  I still need to choose fabric for borders to give the quilt some size, but here's a quick preview. 

 
I bought 2 Good Morning charm packs a Quilt Shop Hop last fall from the Me and My Sister Design line.  To make the pinwheel, simply cut charm square in half and sew into the pinwheel pattern.  I ended up with 21 completed blocks, and chose my 20 favorite for the bulk.  Right now the quilt is about 32x40.  I'd like the finished size to be somewhere around 50x60, so I'll be in the market for great coordinating fabric to finish out the borders, backing and binding.  I'll keep you posted!


1/24/2013

Mr & Mrs

So I previously mentioned that my mom and I am trying to DIY a few things for my upcoming wedding.  Well, I'm excited to show you my most recent project! 

Supplies:
Cardboard letter blocks
Paint and brush - I used Folk Art Plaid in a cream color and a foam brush
Flower embellishments - I used Reflections brand found at Michaels in ivory
Rhinestone and pearl embellishments
Glue gun and glue sticks

Directions:
Paint the letter blocks.  I thought spray painting would be the way to go.  Sadly, with Kansas wind and the position of my house, it was a terrible idea.  I ended up repainting them with Folk Art paint.  A couple coats was sufficient.

After the paint dries, lay the letters flat on your work surface.  Arrange the flowers on the letters and glue on when you are satisfied with the position.  Because the flower embellishments didn't have centers, I used the rhinestone and pearl embellishments to complete the flowers.


These will be on the sweetheart table at the reception with my bouquet in the middle instead of an & sign.  So pleased!  T advises he was quite impressed and is coming around to my crafting and DIYing tendencies. 
 
The great thing about cardboard block letters is that they are so versatile.  They could be painted green and red and embellished with Christmas items, customized to read your last name, etc.  The possibilities are endless!

1/20/2013

DIY Photo Pendants

I love DIY projects.  I enjoy the creative outlet and the ability to personalize all as many or as few details as I want.  After my grandma passed away last month, I knew I wanted to do something at my wedding to remember her.  I ran across these Crystal Pendants that I liked, but I found the crystal chandalier pieces to cause a slight distortion to the photo.  I spent some time browsing for alternatives online and found a great seller on Amazon called Beadaholique that sells a ton of jewelry related items.  I ordered a few different style tiles and other supplies and within just a few days had acquired all the supplied I needed for this project.  Just a side note, it took several days to complete due to dry time on the paints and glues.

Supplies:
Glass tiles of your choice (I chose a large 1 7/8 inch tile and 30x40mm glass piece from a pendant kit)
E6000 Industrial Strength Glue Adhesive
Small Plated Jewelry Bails
Jewely Wire, .18mm
Beads of your choice
Jewelry Wire Cutters
Jewelry Crimping Tool
Crimp Tube
Plaid's Folk Art Acrylic Paint (I chose silver)
Paint Brush
Printed Photos to fit the size of your tiles
Mod Podge 3D
Scissors

Directions:
First, apply E6000 to the back of the tile.  Slowly lay the tile onto the photo side and press gently to avoid air bubbles.  Allow 24 hours to dry.

Once the photo and pendant are adhered, cut excess paper from tile.  Then lay photo side down and cover with Modge Podge 3D.  Allow 24 hours to dry.

One Modge Podge is dry, paint one to two coats of silver paint on back of pendant. 

Next, attach a bail to your pendant using the E6000.  Let dry overnight.

 
Once pendant is dry, you're ready to string the wire with beads.  It is completely up to you how to do this - you can make a necklace, an ornament, whatever you'd like.  I chose to make a short beaded strand.  Once you achieve the desired length, strand the wire in opposite directions through the crimp tube to create a loop.  Pinch the crimp tool in place.
 
 
That's all there is to it.  I made one for my late grandma and one for my late aunt.  I'll either be tying them to my bouquet or to a vase with flowers in their memory.  I'm beyond pleased with how they turned out and am looking forward to having them with me on our wedding day.


12/21/2012

Mosaic Love

My fiance and I recently had one of our engagement pictures printed on canvas.  I was so excited to hang it, but quickly realized the wall needed something else.  I quickly decided a small shelf with something decorative was the way to go.  But what would that something decorative be?  I decided to head to Hobby Lobby and see what I could find. 

Supplies:
Cardboard letters (see photo below) - they're 3D, heavier duty and perfect for decorating
Various sheets of coordinating scrapbook paper
Mod Podge, matte
Sponge brush


Directions:
I first tore off several small pieces of each scrapbook sheet and made a little pile of torn paper.  Then I got to work glueing the pieces onto the letters.  Modge Podge works as both a glue and a varnish so you want to make sure its both under and over the pieces of paper.  Fill in each letter covering as much or as little as you'd like.  Finish with one final coat of Modge Podge over the entire project.  And voila!

 
I decided only mosaic the tops and left all of the sides with their natual cardboard color.  I did put a coat of Modge Podge for a slight varnish, but wanted the front to really stand out.  I also decided that as much as I love these, they didn't fit well with the intended idea.  They've now found a home on one of our bookshelves and we used vinyl lettering to finish our canvas instead.


11/14/2012

Past Projects

Wow!  So much has happened since I last posted on this blog!  After a family illness, vacations, engagement, lots of overtime at work, and other life events, I'm back and hoping to do a much better job at documenting my crafting, cooking and everything in between.

So here are a few projects I've finished over the last several months.

I made this spring wreath using the same idea of my St. Patrick's Day wreath.  The yard wrapped wreaths are such an easy way to spruce up the front door for any holiday! 


My First Quilted Wall Hanging!  I returned the pattern to its originaly owner and can't recall the designer.  But I'm super happy with the outcome of this project!


This T-Shirt Quilt was made for my fiance for his birthday.  He had so many shirts from his college days that he had a hard time throwing out.  My alternative: design a quilt with his favorite shirts.  Special thanks to my mom for all her help with this project!  It was quite overwhelming for me as one of my first projects, but my mom stepped in and shared her expertise with me on this special project.
 
 
I've yet to find or design a decoration for our front door for the summer time.  This year, I opted to make a neutral yarn wreath for off season times.


Next is a fun Halloween decoration made with random fabrics from my mom's fabric scraps.  The pattern is called October Scare and is super easy to make.
 

My most recent project is a fall color wreath.  Unfortunately, the colors in this photo aren't great.  Instead of yarn, I opted for Jute to wrap the wreath form.  The flowers were both felt flowers and flower embellishments I found in the scrapbook section in orange, brown, green and burgundy. 


I'm so grateful to my mom for introducting quilting and crafting to me.  They provide such an outlet and find both incredibly relaxing.  I've got a few project in progress and I hope to share them soon!


2/19/2012

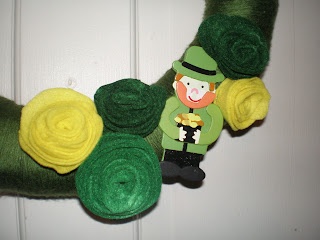
Yarn Wreath - St. Patrick's Day

I love St. Patrick's Day!  And I love decorating for it!  After seeing Take Heart's yarn wreath tutorial, I knew it would be perfect for a new St. Patrick's Day decoration!  First step: Hobby Lobby!

Supplies:
Yarn - I used Naturally Caron.com Spa yarn since it had the green I liked the best.  It's 251 yards.
Straw Wreath Form - Leave the plastic on.
Felt
Scissors
Hot Glue
Embellishments - Optional.  I chose a leprechaun I found in the craft section.


Directions:
First, wrap the wreath with the yarn.  Tie it at the beginning and you can wrap right over the knot.  It'll take some time (about two hours!), but its a perfect activity for catching up on missed tv shows. 


When you get close to the end, add a loop to hang the wreath.  You can really add this at any point you'd like.  I also tied the end of the yard to the loop to tie it off.


After finishing the wreath, I wanted to add some St. Patty's Day flare: felt flowers and a cute leprechaun embellishment. 

To make the flowers, cut a curvy edged circle like so:


Pick a place and start cutting in a spiral shape for a long strand of fabric.  Make sure to leave an oval shape at the end for the base of the flower.


Take the end of the felt that you began cutting and roll.


Keep rolling until you're at the end.  Using the hot glue, paste the oval shape over the bottom to hold the flower together.


Finished flower:


Make as many flowers as you'd like.  Once you've finished your flowers, you're ready to hot glue them and any additional embellishments onto your wreath. 


I love it!  And I'm excited that I have a month to display it! 


1/24/2012

Melted Crayon Field of Flowers

Pinterest has a ton of beautiful pieces of artwork including melted crayon art.  I've seen several designs, but this one by JKCreate is one of my favorites.  I spent some time looking over the piece and decided I would try to recreate the design. 

Supplies:
Art Canvas - I used 16X20.
Crayons - I bought a box of 144 but only used the greens, browns, and yellows.  I also had to add in a few from a box of 12 and a box of 24 to cover edge to edge.
Hair Dryer
Splatter Protection
Glue Gun and Glue Sticks
Flower Embellishments


Directions:
First, I pulled all of the greens, browns and yellows from the box of Crayons. 


Next, I used the glue gun and glued each crayon onto the bottom of the canvas with the point towards the top.


After gluing all of the crayons to the canvas, I was ready to set up my melting station.  As the crayons heat, they will splatter, so you want to be sure to protect the area you're working in.  I leaned the canvas against an old box so the crayon would drip down the canvas as the wax melted.  I also used old boxes on either side to catch any of the splatter.  Once I had everything set up, I was ready to start melting the crayons. 

I used high heat and held the hair dryer 3-5 inches away from the crayons.  I started getting results within just a few minutes.

Continue this process until you have the amount of melted crayon you'd like.  Once the crayon is dry, you can flip your canvas over to add the embellished flowers.


Use the hot glue to attach as few or as many flowers as you'd like to your artwork.  Once completed, you can frame or hang as is!


1/23/2012

Valentine's Day Ribbon Wreath

My recent discovery of Pinterest has resulted in a strong desire to experiment with crafting and cooking.  What better way to explore these new finds than through blogging! 

My first project was inspired by Tator Tots and Jello's Halloween Ribbon Wreath.  I loved the variety of ribbon and the prospect of experimenting with the different textures.  First stop, Hobby Lobby!

Supplies Needed:

Ribbon - I bought 6 varieties to go with the 3 I already had.  Hobby Lobby runs a sale on ribbon quite often.
Glue Gun and Glue Sticks
Wreath - I chose a heart, but any shape will do.
Felt - This is optional.  I used it to hide the wreath form, so use your judgement.

Instructions:

First, I laid out all of my supplies to make sure I wasn't missing anything.  Then, I wrapped my wreath form in pink felt to hide the wreath form. 


After the wreath form is wrapped, you're ready to prep the ribbon.  I cut the ribbon around 4-6". 


Next fold the ribbon in half and hot glue the ends together. 


Once you've looped your ribbon, you're ready to glue it to your wreath form.  Mix and match the ribbon and try not to overthink it.  Make sure to cover the top, outside and inside of your wreath form. 

Once I finished gluing all of the loops to the wreath, I glued a long ribbon to either side of the back of the wreath for hanging.  And voila!