Pages

Showing posts with label holiday. Show all posts

2/13/2014

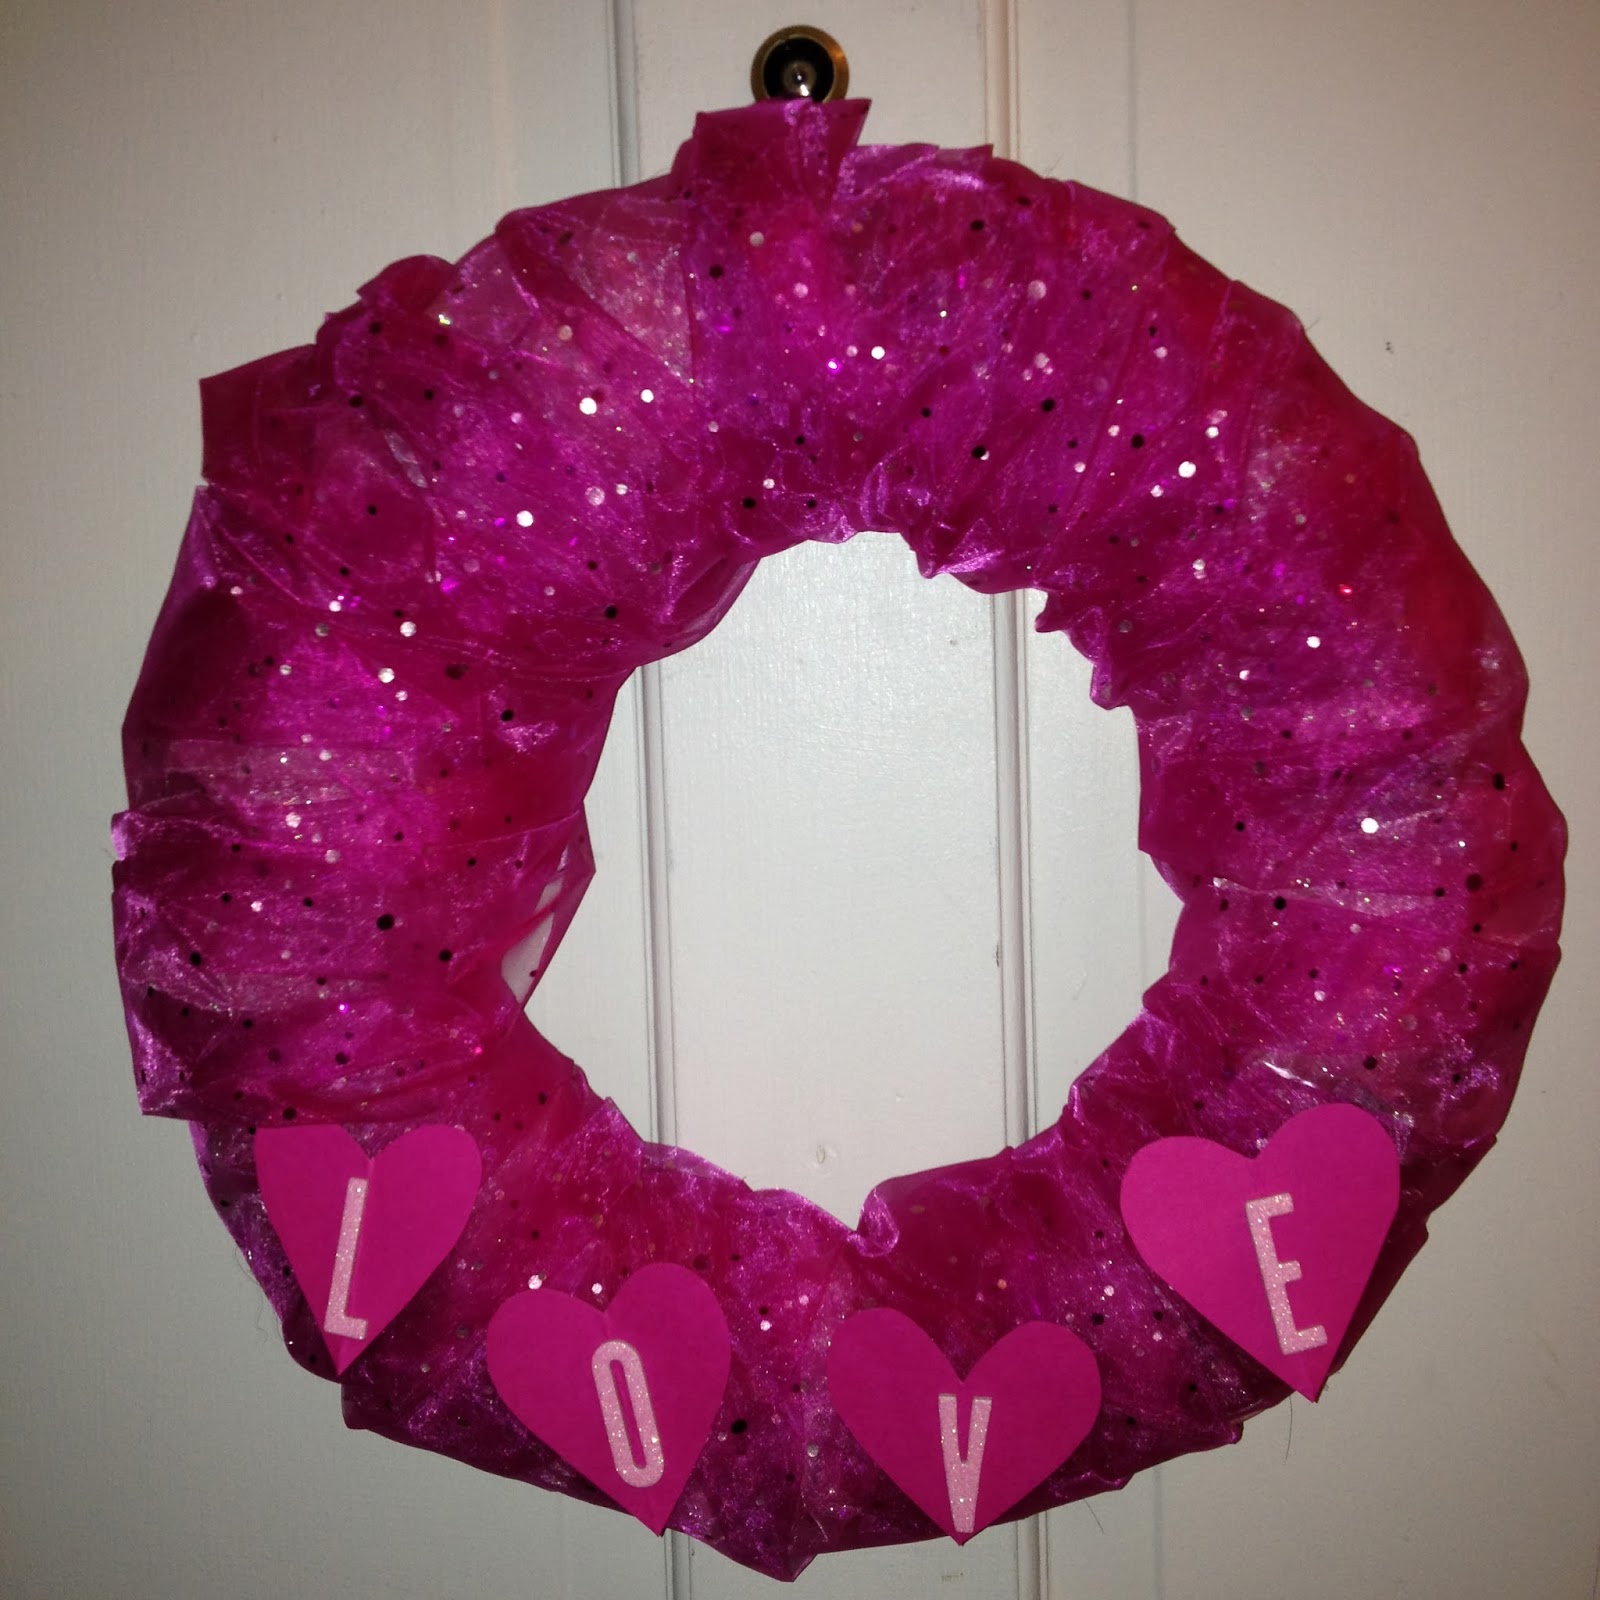
Valentine's Day Tulle Wreath

Valentine's Day will be here in just a few short hours!  Need a last minute decoration?  Check out this easy tulle wreath!  Or, try this style with the next holiday!


Supplies:
2-3 spools tulle (in the ribbon section at Hobby Lobby)
straw wreath form
hot glue gun and glue sticks
1 sheet scrapbooking paper
scrapbooking letters

Directions:
Loosely wrap the wreath with the tulle.  I used about 2 and 1/2 spools of tulle to continuously wrap the wreath to make sure the wreath was fluffy and light.  All ends should be hot glued on the back of the wreath.  I used a small piece of tulle to create a loop on the back for hanging.

Once the wreath is complete, cut four hearts out of your scrapbook paper.  Spell out L-O-V-E on the hearts and hot glue them onto the wreath.

Super easy and cute!  A versatile to boot!

1/01/2014

Happy New Year! And Sweet Clementine Cranberry Muffins too!

Happy New Year to each of you!  I hope you all had a safe and happy celebration and enjoyed the first day of 2014!  We're in the homestretch to my sister-in-laws wedding and will be spending the next couple of days assisting in final preparations.  But - I still wanted to be sure to stop by and share a recent recipe with you!  Check is out!

Sweet Clementine Cranberry Muffins
Adapted from Blue Bonnets and Brownies

Ingredients:
2 sticks unsalted butter, melted
3 cups sugar
1/2 teaspoon salt
4 large eggs
2 teaspoons vanilla extract
4 2/3 cup flour
4 teaspoons baking powder
1/2 teaspoon nutmeg
2 teaspoons cinnamon
3 clementines, sectioned and chopped
1 5-oz package dried cranberries
1 cup buttermilk

Directions:
Preheat oven to 375 degrees.  Grease 2 standard muffin trays.

Melt butter and add to mixing bowl.  Add sugar, salt, eggs and vanilla and whisk briskly to combine.

In a separate bowl, combine flour, nutmeg, cinnamon, and baking powder.  Use a dry whisk to mix.  Pour mixture on top of butter mixture but do not stir.

Peal and chop clementines and mix with dried cranberries.  Add on top of flour mixture.  Fold the mixture together and few times until mixture is crumbly.  Be careful not to overmix.

Create a small dip in the mixture and add the buttermilk.  Gently fold until the buttermilk is absorbed into the dry mixture.

Fill your muffin cups to the top with the mixture.  Bake for approximately 27-30 minutes or until muffins are golden brown.  Remove from the pan and allow to cool.

Makes 24 muffins.  Store in airtight container.

These muffins are quite delicious!  They were a hit with the family when served on Christmas morning!  One thing to note, they are a little heavier than a "normal" muffin, but still taste great!  Enjoy!


12/21/2013

Chocolate Peppermint Meringues

Hi everyone!  Hope you're having a great weekend so far!  Just thought I'd stop by and share a quick recipe if you're in need of a last minute holiday treat.  I made these for my work Christmas party last week and they were delicious!  Without further ado: Chocolate Peppermint Meringues (adapted from Joyofbaking.com).

Ingredients:
6 egg whites
2 cups granulated sugar - I chose to use Splenda
1 teaspoon vanilla extract
2 tablespoons cocoa powder
1/3 cup crushed candy canes
3/4 cup mini chocolate chips

Directions:
Preheat oven to 300 degrees.

Put egg whites into stand-up mixer and whisk until small bubbles form.  Add sugar and mix until stiff peaks form.  Add cocoa powder and vanilla and mix well.  Fold in crushed candy canes and mini chocolate chips.

Pour mixture into piping bag and pipe onto parchment paper lined cookie trays.  Place in preheated oven for 1 minutes and then turn oven off.  Leave in oven with door closed for 3 hours or until cookie is crisp.

Yum yum!

12/20/2013

Peppermint Meringues

Hi everyone!  Hope you're all doing well!

I wanted to drop in and share the recipe for the Peppermint Meringues made for my sister-in-law's bridal shower.  They were delicious!  And so easy to make!  This recipe was adapted from Simplyrecipes.com and Whipperberry.com.  

Ingredients/Supplies:
6 egg whites
1 1/2 cups sugar
1/2 teaspoon peppermint extract
Pinch of salt
Red food coloring gel
Parchment paper
Gallon size freezer bag

Directions: 
Preheat oven to 300 degrees

Put egg whites and pinch of salt into stand-up mixer.  Start mixing the egg whites on low and gradually increase until foamy and soft peaks form.  Slowly add sugar and increase mixing speed.  Mix until stiff peaks are formed and then add peppermint extract and food coloring.  Mix on low until food coloring is well blended.

Place parchment paper over the top of your cookie sheet.  Spoon mixture into the freezer bag and cut one corner.  Pipe about 1 to 1 1/2 inch mounds onto the cookie sheet.  

Put meringues into oven and close the door.  After 1 minute, turn the heat off.  Leave the doors to the oven closed for at least 3 hours or overnight.  The meringues will cook and dry out with the residual heat of the oven.  A completed meringue will be hard and crunchy.

Store in an airtight container.  Makes approximately 40-50 meringues.

Enjoy!

12/18/2013

DIY Hot Chocolate Bar {Recipe Included}

Hey-oh!  Can you believe Christmas is a week away!?  Seriously, this year has flown by.  Our shopping is complete.  Most of the presents are wrapped.  So the next few days will be filled with wrapping the rest of the gifts, cleaning the house, last minute grocery shopping and baking, and most importantly, spending time with our families.  This weekend we're headed to Illuminations at our local Botanical Garden.  They have thousands of lights scattered throughout the many gardens so it's always a beautiful time to visit.  We're also off to see "A White Christmas" at one of our local music theaters with my parents, grandparents, aunts, uncles and cousins (20 total!).  I'm really looking forward to this weekend and making memories with the people we love.

I was fortunate to have the day off today.  I spent a few hours baking Chocolate Cranberry Cookies and Chocolate Meringues (recipes coming soon!) for our work celebrations tomorrow.  I also had the opportunity to enjoy lunch with my husband.  We aren't able to meet up often over the lunch hour due to our schedules, so our lunch dates are always enjoyable.

This past weekend I hosted a bridal shower for my sister-in-law.  The Hot Chocolate Bar was a success and I'm excited to share the details with you!

Hot Chocolate Recipe:
3 cups Swiss Miss Powder Mix - I purchased a bulk can at our local grocery store
3 cups Heavy Whipping Cream
6 quarts Water
Crock pot
Meat thermometer

Directions:
Mix the three ingredients together.  Turn your crock pot on high to heat the hot chocolate.  We used our meat thermometer to keep the temperature of the the hot chocolate around 130 degrees.  Serve and enjoy!

For the toppings, we opted to offer Reddi-Whip, ground cinnamon, crushed candy canes, full size candy canes, mini chocolate chips, marshmallows and white chocolate chips.  We put each item in its own serving dish and let people pick and choose what and how much they wanted.  The bar was a hit!


Enjoying the hot chocolate bar back home!  Yum!


 Next time: Peppermint Meringues!


12/02/2013

Easy Tie Ribbon Wreath

One more Halloween project and I promise I'll be done until next year!  The great thing about this wreath is you can make it for any season or holiday.  Check it out!

Supplies:
Ribbon - I can't remember how many rolls I used.  Maybe 10?  I way overbought and had to return a ton.  Helpful, I know.
Straw Wreath
Ornament - optional

Directions:
So simple!  Tie strips of ribbon around the wreath until the wreath form is completely covered.  Mix and match the ribbon throughout the process.  If you chose to use an ornament, slip the ornament string over one of the ribbons as you tie it on.  For uniformity, I cut the end of each ribbon at an angle.


12/01/2013

Yummy Mummies

Hey-oh!  So I mentioned in a previous post that I would share a super easy Yummy Mummy recipe.  I know it's late, but next year, right?!

Source: http://www.pillsbury.com/recipes/crescent-mummy-dogs/d52a57d7-ab8a-4a1c-8dae-f9f90d03b912

Ingredients:
8-10 Hot Dogs
1 Can Dough Sheet
Mustard
Cooking Spray

Directions:
Heat oven to 375 degrees.

Cut dough into strips.  Wrap dough around hot dogs like bandages leaving a half inch open area at one end for a face.  Place on an ungreased cookie sheet.  Lightly spray with cookie spray.  Bake 13-17 minutes or until dough is golden brown.  Using the mustard and a fork, draw eyes onto your mummies.  Serve and enjoy!

11/28/2013

Happy Thanksgiving!!!

Good morning, everyone!  I hope you all have a wonderful Thanksgiving full of love, laughter, family and many blessings.  


Precious pumpkins made by my mama.

4/07/2013

Double Chocolate Chip Cookies

Hi, everyone!  Hope you had a great weekend!  We've kept things pretty low-key this weekend. We visited my grandparents, did some grocery shopping saw Jurassic Park in Imax 3D and made cookies with our brand new Kitchenaid Mixer.  That's right - our Kitchenaid Mixer.  I seriously have some of the best co-workers.  Ever.  They surprised with me a wonderful bridal shower last week and this wonderful gift.  I.  Love.  It. 


So as a way to thank them for their wondefulness and genoristy, I decided to make delicious Double Chocolate Chip Cookies.  I searched the Hershey's Kitchens website and found Hershey's "Perfectly Chocolate" Chocolate Chip Cookies.  No changes this time round, just ditched the nuts.
Ingredients:
2 1/4 cup all purpose flour
1 teaspoon baking soda
2 sticks margarine, softened
3/4 cup packed brown sugar
2 eggs
1/3 cup cocoa
1/2 teaspoon salt
3/4 granulated sugar
1 teaspoon vanilla extract
1 package chocolate chips (11.5 oz)

Directions:
Preheat oven to 375 degrees.

Stir together flour, cocoa, baking soda and salt.  Beat butter, granulated sugar, brown sugar and vanilla in a large bowl on medium speed of mixer until creamy.  Add eggs and beat well.  Gradually add flour mixture, beating well.  Stir in chocolate chips.  Drop by teaspoons onto ungreased cookie sheets (I used a melon baller to scoop the cookies). 

Bake 8-10 minutes or until set.  Cool slightly, then transfer to a wire cooling rack.  Makes about 5 dozen cookies.


(Love the Wilton stackable cookie sheets!)


1/24/2013

Mr & Mrs

So I previously mentioned that my mom and I am trying to DIY a few things for my upcoming wedding.  Well, I'm excited to show you my most recent project! 

Supplies:
Cardboard letter blocks
Paint and brush - I used Folk Art Plaid in a cream color and a foam brush
Flower embellishments - I used Reflections brand found at Michaels in ivory
Rhinestone and pearl embellishments
Glue gun and glue sticks

Directions:
Paint the letter blocks.  I thought spray painting would be the way to go.  Sadly, with Kansas wind and the position of my house, it was a terrible idea.  I ended up repainting them with Folk Art paint.  A couple coats was sufficient.

After the paint dries, lay the letters flat on your work surface.  Arrange the flowers on the letters and glue on when you are satisfied with the position.  Because the flower embellishments didn't have centers, I used the rhinestone and pearl embellishments to complete the flowers.


These will be on the sweetheart table at the reception with my bouquet in the middle instead of an & sign.  So pleased!  T advises he was quite impressed and is coming around to my crafting and DIYing tendencies. 
 
The great thing about cardboard block letters is that they are so versatile.  They could be painted green and red and embellished with Christmas items, customized to read your last name, etc.  The possibilities are endless!

1/08/2013

Chocolate Chip Pumpkin Bread

Good evening!  After enjoying dinner out with friends from work, I decided to come home and bake.  T's mom brought chocolate chip pumpkin bars to our Christmas celebration and I knew I wanted to make some as well.  My fiance will be home tomorrow night, and after being sick and on the road, I decided he'd enjoy a special dessert bread. 

We've made super simple pumpkin spice muffins before using 1 box of spice cake and 1 can of pumpkin.  This time I decided to add something sweet: chocolate!

Ingredients:
1 box spice cake mix
1 can pumpkin (15 oz)
2 cups chocolate chips
powdered sugar, optional

Directions:
Preheat oven to 350.  Combine cake mix and pumpkin in bowl.  Mix well, then beat on medium speed for 2 minutes.  Add 1 cup chocolate chips and mix well.  Pour into greased 9x13 pan.  Sprinkly additional chocolate chips over top.  Bake 30 minutes, or until toothpick inserted in center comes out clean.  After you've removed from the oven, sprinkle with powdered sugar, if desired.


11/14/2012

Past Projects

Wow!  So much has happened since I last posted on this blog!  After a family illness, vacations, engagement, lots of overtime at work, and other life events, I'm back and hoping to do a much better job at documenting my crafting, cooking and everything in between.

So here are a few projects I've finished over the last several months.

I made this spring wreath using the same idea of my St. Patrick's Day wreath.  The yard wrapped wreaths are such an easy way to spruce up the front door for any holiday! 


My First Quilted Wall Hanging!  I returned the pattern to its originaly owner and can't recall the designer.  But I'm super happy with the outcome of this project!


This T-Shirt Quilt was made for my fiance for his birthday.  He had so many shirts from his college days that he had a hard time throwing out.  My alternative: design a quilt with his favorite shirts.  Special thanks to my mom for all her help with this project!  It was quite overwhelming for me as one of my first projects, but my mom stepped in and shared her expertise with me on this special project.
 
 
I've yet to find or design a decoration for our front door for the summer time.  This year, I opted to make a neutral yarn wreath for off season times.


Next is a fun Halloween decoration made with random fabrics from my mom's fabric scraps.  The pattern is called October Scare and is super easy to make.
 

My most recent project is a fall color wreath.  Unfortunately, the colors in this photo aren't great.  Instead of yarn, I opted for Jute to wrap the wreath form.  The flowers were both felt flowers and flower embellishments I found in the scrapbook section in orange, brown, green and burgundy. 


I'm so grateful to my mom for introducting quilting and crafting to me.  They provide such an outlet and find both incredibly relaxing.  I've got a few project in progress and I hope to share them soon!


2/19/2012

Yarn Wreath - St. Patrick's Day

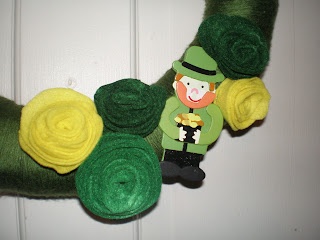
I love St. Patrick's Day!  And I love decorating for it!  After seeing Take Heart's yarn wreath tutorial, I knew it would be perfect for a new St. Patrick's Day decoration!  First step: Hobby Lobby!

Supplies:
Yarn - I used Naturally Caron.com Spa yarn since it had the green I liked the best.  It's 251 yards.
Straw Wreath Form - Leave the plastic on.
Felt
Scissors
Hot Glue
Embellishments - Optional.  I chose a leprechaun I found in the craft section.


Directions:
First, wrap the wreath with the yarn.  Tie it at the beginning and you can wrap right over the knot.  It'll take some time (about two hours!), but its a perfect activity for catching up on missed tv shows. 


When you get close to the end, add a loop to hang the wreath.  You can really add this at any point you'd like.  I also tied the end of the yard to the loop to tie it off.


After finishing the wreath, I wanted to add some St. Patty's Day flare: felt flowers and a cute leprechaun embellishment. 

To make the flowers, cut a curvy edged circle like so:


Pick a place and start cutting in a spiral shape for a long strand of fabric.  Make sure to leave an oval shape at the end for the base of the flower.


Take the end of the felt that you began cutting and roll.


Keep rolling until you're at the end.  Using the hot glue, paste the oval shape over the bottom to hold the flower together.


Finished flower:


Make as many flowers as you'd like.  Once you've finished your flowers, you're ready to hot glue them and any additional embellishments onto your wreath. 


I love it!  And I'm excited that I have a month to display it! 


1/23/2012

Valentine's Day Ribbon Wreath

My recent discovery of Pinterest has resulted in a strong desire to experiment with crafting and cooking.  What better way to explore these new finds than through blogging! 

My first project was inspired by Tator Tots and Jello's Halloween Ribbon Wreath.  I loved the variety of ribbon and the prospect of experimenting with the different textures.  First stop, Hobby Lobby!

Supplies Needed:

Ribbon - I bought 6 varieties to go with the 3 I already had.  Hobby Lobby runs a sale on ribbon quite often.
Glue Gun and Glue Sticks
Wreath - I chose a heart, but any shape will do.
Felt - This is optional.  I used it to hide the wreath form, so use your judgement.

Instructions:

First, I laid out all of my supplies to make sure I wasn't missing anything.  Then, I wrapped my wreath form in pink felt to hide the wreath form. 


After the wreath form is wrapped, you're ready to prep the ribbon.  I cut the ribbon around 4-6". 


Next fold the ribbon in half and hot glue the ends together. 


Once you've looped your ribbon, you're ready to glue it to your wreath form.  Mix and match the ribbon and try not to overthink it.  Make sure to cover the top, outside and inside of your wreath form. 

Once I finished gluing all of the loops to the wreath, I glued a long ribbon to either side of the back of the wreath for hanging.  And voila!