Pages

Showing posts with label wreath. Show all posts

2/13/2014

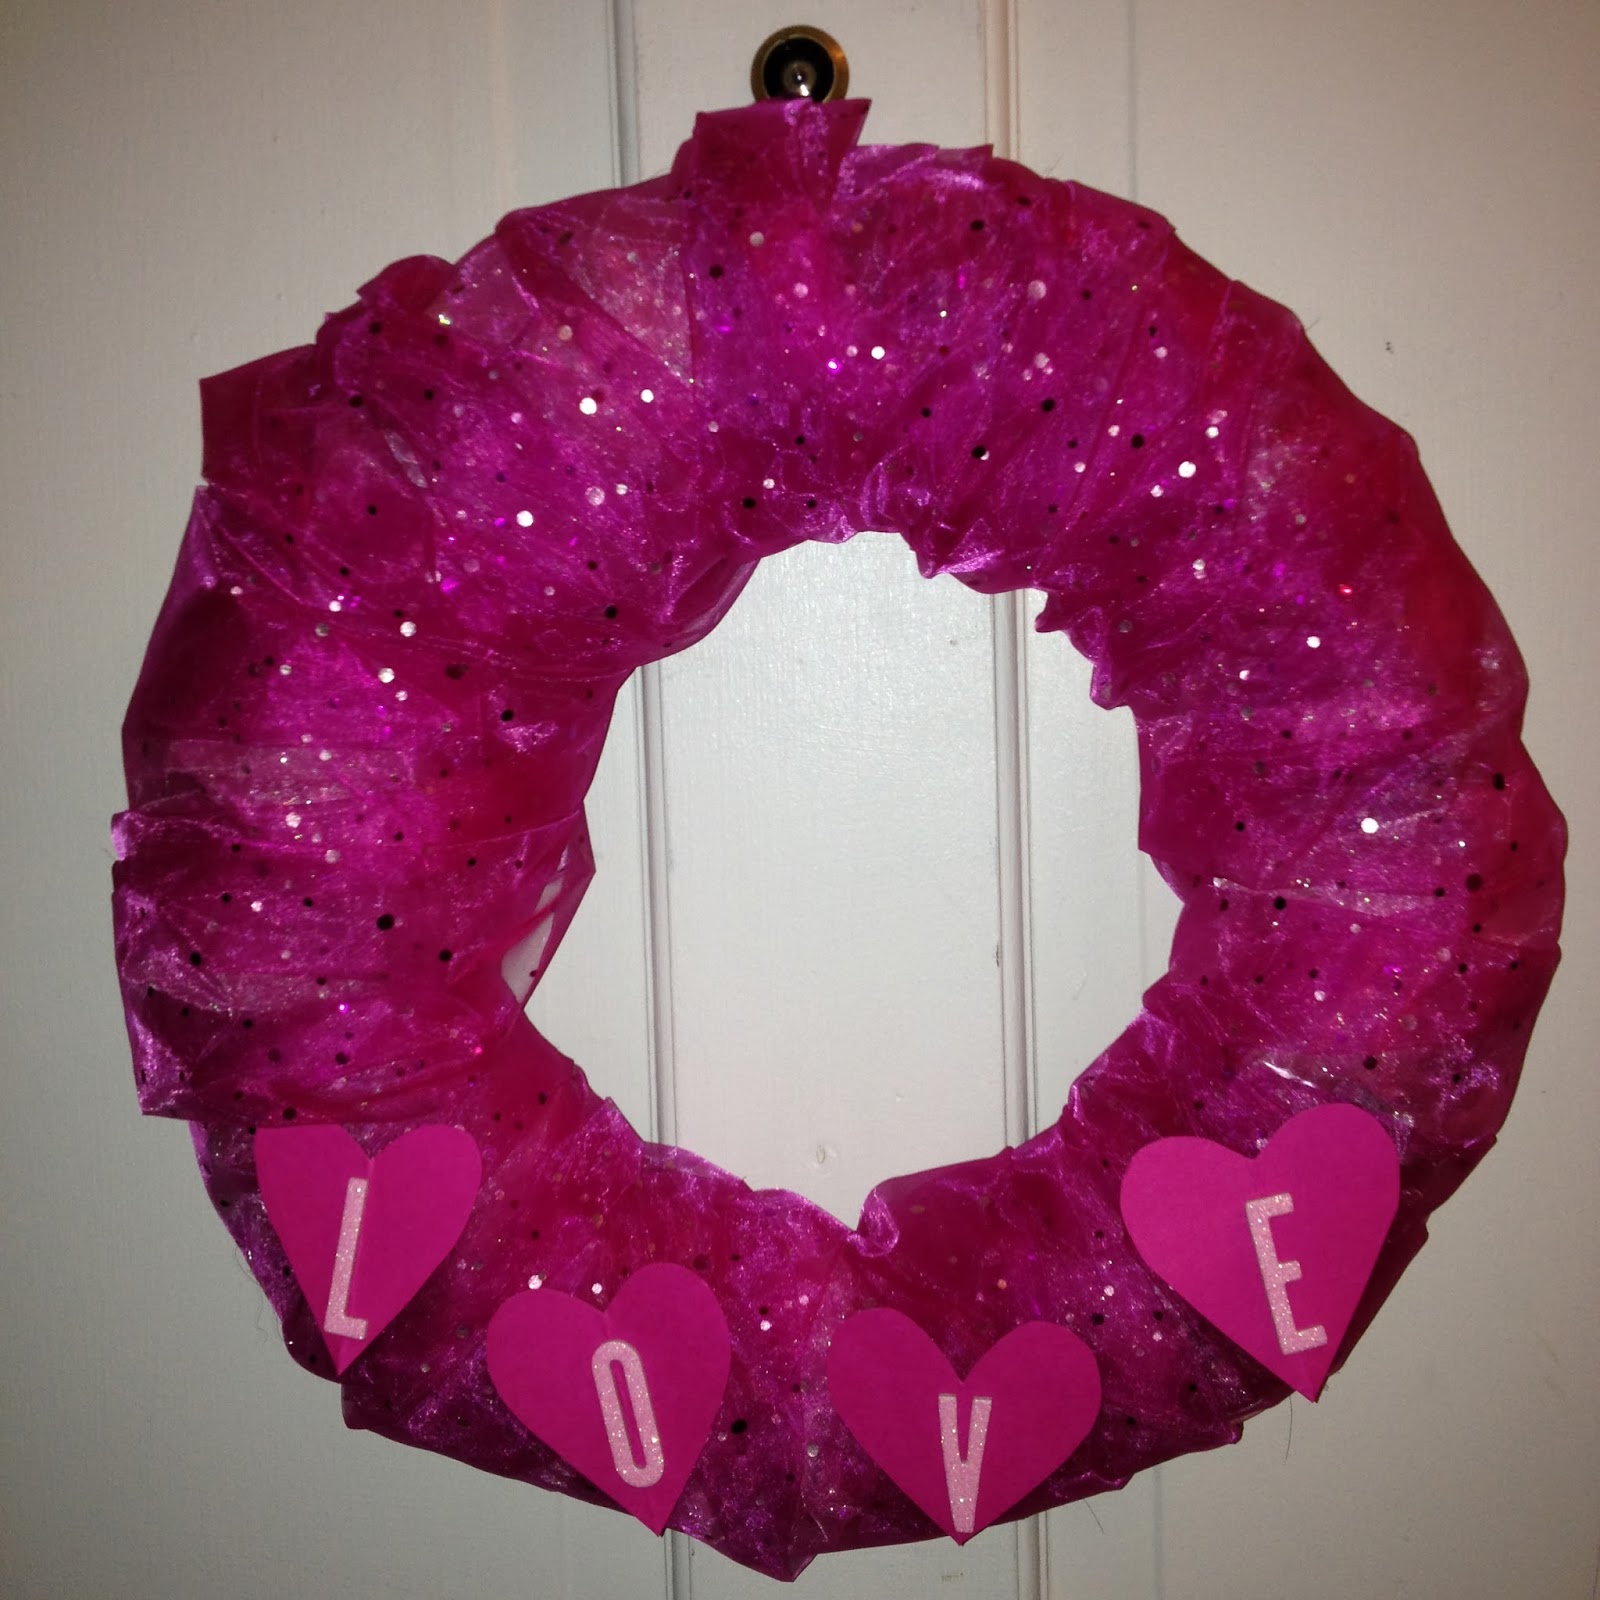
Valentine's Day Tulle Wreath

Valentine's Day will be here in just a few short hours!  Need a last minute decoration?  Check out this easy tulle wreath!  Or, try this style with the next holiday!


Supplies:
2-3 spools tulle (in the ribbon section at Hobby Lobby)
straw wreath form
hot glue gun and glue sticks
1 sheet scrapbooking paper
scrapbooking letters

Directions:
Loosely wrap the wreath with the tulle.  I used about 2 and 1/2 spools of tulle to continuously wrap the wreath to make sure the wreath was fluffy and light.  All ends should be hot glued on the back of the wreath.  I used a small piece of tulle to create a loop on the back for hanging.

Once the wreath is complete, cut four hearts out of your scrapbook paper.  Spell out L-O-V-E on the hearts and hot glue them onto the wreath.

Super easy and cute!  A versatile to boot!

12/02/2013

Easy Tie Ribbon Wreath

One more Halloween project and I promise I'll be done until next year!  The great thing about this wreath is you can make it for any season or holiday.  Check it out!

Supplies:
Ribbon - I can't remember how many rolls I used.  Maybe 10?  I way overbought and had to return a ton.  Helpful, I know.
Straw Wreath
Ornament - optional

Directions:
So simple!  Tie strips of ribbon around the wreath until the wreath form is completely covered.  Mix and match the ribbon throughout the process.  If you chose to use an ornament, slip the ornament string over one of the ribbons as you tie it on.  For uniformity, I cut the end of each ribbon at an angle.


4/06/2013

Burlap Ribbon Wreath

Looking for a simply door or wall decoration?  Try something like this:


Supplies:
Straw wreath form, with plastic left on
Hot glue gun and glue sticks
Burlap ribbon
Wooden letter
Flower embellishments (found in the scrapbook area)
Ribbon

Directions:
First, glue the end of the burlap ribbon to the back of your wreath form.  Once dry, wrap the burlap ribbon around the wreath form until the wreath is covered.  I needed exactly one roll of the burlap ribbon.  Hot glue the end of the burlap ribbon to the back of the wreath form. 

Lay out your letter and embellishments until you find your favorite layout.  Once you've found the layout of your choice, hot glue the embellishments in place. 

On the back of the wreath, stick your scissors through the burlap making a small hole.  Thread small piece of ribbon and form hanging loop.  Hot glue loop to burlap for extra support.

Once completed, hang in your desired location.  I'm pleased with the results of this wreath.  I've not worked with burlap ribbon before and was slighly nervous as to how it would work with hot glue or how the black would look wrapping the wreath.  But I must say, it looks good!

11/14/2012

Past Projects

Wow!  So much has happened since I last posted on this blog!  After a family illness, vacations, engagement, lots of overtime at work, and other life events, I'm back and hoping to do a much better job at documenting my crafting, cooking and everything in between.

So here are a few projects I've finished over the last several months.

I made this spring wreath using the same idea of my St. Patrick's Day wreath.  The yard wrapped wreaths are such an easy way to spruce up the front door for any holiday! 


My First Quilted Wall Hanging!  I returned the pattern to its originaly owner and can't recall the designer.  But I'm super happy with the outcome of this project!


This T-Shirt Quilt was made for my fiance for his birthday.  He had so many shirts from his college days that he had a hard time throwing out.  My alternative: design a quilt with his favorite shirts.  Special thanks to my mom for all her help with this project!  It was quite overwhelming for me as one of my first projects, but my mom stepped in and shared her expertise with me on this special project.
 
 
I've yet to find or design a decoration for our front door for the summer time.  This year, I opted to make a neutral yarn wreath for off season times.


Next is a fun Halloween decoration made with random fabrics from my mom's fabric scraps.  The pattern is called October Scare and is super easy to make.
 

My most recent project is a fall color wreath.  Unfortunately, the colors in this photo aren't great.  Instead of yarn, I opted for Jute to wrap the wreath form.  The flowers were both felt flowers and flower embellishments I found in the scrapbook section in orange, brown, green and burgundy. 


I'm so grateful to my mom for introducting quilting and crafting to me.  They provide such an outlet and find both incredibly relaxing.  I've got a few project in progress and I hope to share them soon!


2/19/2012

Yarn Wreath - St. Patrick's Day

I love St. Patrick's Day!  And I love decorating for it!  After seeing Take Heart's yarn wreath tutorial, I knew it would be perfect for a new St. Patrick's Day decoration!  First step: Hobby Lobby!

Supplies:
Yarn - I used Naturally Caron.com Spa yarn since it had the green I liked the best.  It's 251 yards.
Straw Wreath Form - Leave the plastic on.
Felt
Scissors
Hot Glue
Embellishments - Optional.  I chose a leprechaun I found in the craft section.


Directions:
First, wrap the wreath with the yarn.  Tie it at the beginning and you can wrap right over the knot.  It'll take some time (about two hours!), but its a perfect activity for catching up on missed tv shows. 


When you get close to the end, add a loop to hang the wreath.  You can really add this at any point you'd like.  I also tied the end of the yard to the loop to tie it off.


After finishing the wreath, I wanted to add some St. Patty's Day flare: felt flowers and a cute leprechaun embellishment. 

To make the flowers, cut a curvy edged circle like so:


Pick a place and start cutting in a spiral shape for a long strand of fabric.  Make sure to leave an oval shape at the end for the base of the flower.


Take the end of the felt that you began cutting and roll.


Keep rolling until you're at the end.  Using the hot glue, paste the oval shape over the bottom to hold the flower together.


Finished flower:


Make as many flowers as you'd like.  Once you've finished your flowers, you're ready to hot glue them and any additional embellishments onto your wreath. 


I love it!  And I'm excited that I have a month to display it! 


1/23/2012

Valentine's Day Ribbon Wreath

My recent discovery of Pinterest has resulted in a strong desire to experiment with crafting and cooking.  What better way to explore these new finds than through blogging! 

My first project was inspired by Tator Tots and Jello's Halloween Ribbon Wreath.  I loved the variety of ribbon and the prospect of experimenting with the different textures.  First stop, Hobby Lobby!

Supplies Needed:

Ribbon - I bought 6 varieties to go with the 3 I already had.  Hobby Lobby runs a sale on ribbon quite often.
Glue Gun and Glue Sticks
Wreath - I chose a heart, but any shape will do.
Felt - This is optional.  I used it to hide the wreath form, so use your judgement.

Instructions:

First, I laid out all of my supplies to make sure I wasn't missing anything.  Then, I wrapped my wreath form in pink felt to hide the wreath form. 


After the wreath form is wrapped, you're ready to prep the ribbon.  I cut the ribbon around 4-6". 


Next fold the ribbon in half and hot glue the ends together. 


Once you've looped your ribbon, you're ready to glue it to your wreath form.  Mix and match the ribbon and try not to overthink it.  Make sure to cover the top, outside and inside of your wreath form. 

Once I finished gluing all of the loops to the wreath, I glued a long ribbon to either side of the back of the wreath for hanging.  And voila!