Pages

2/13/2014

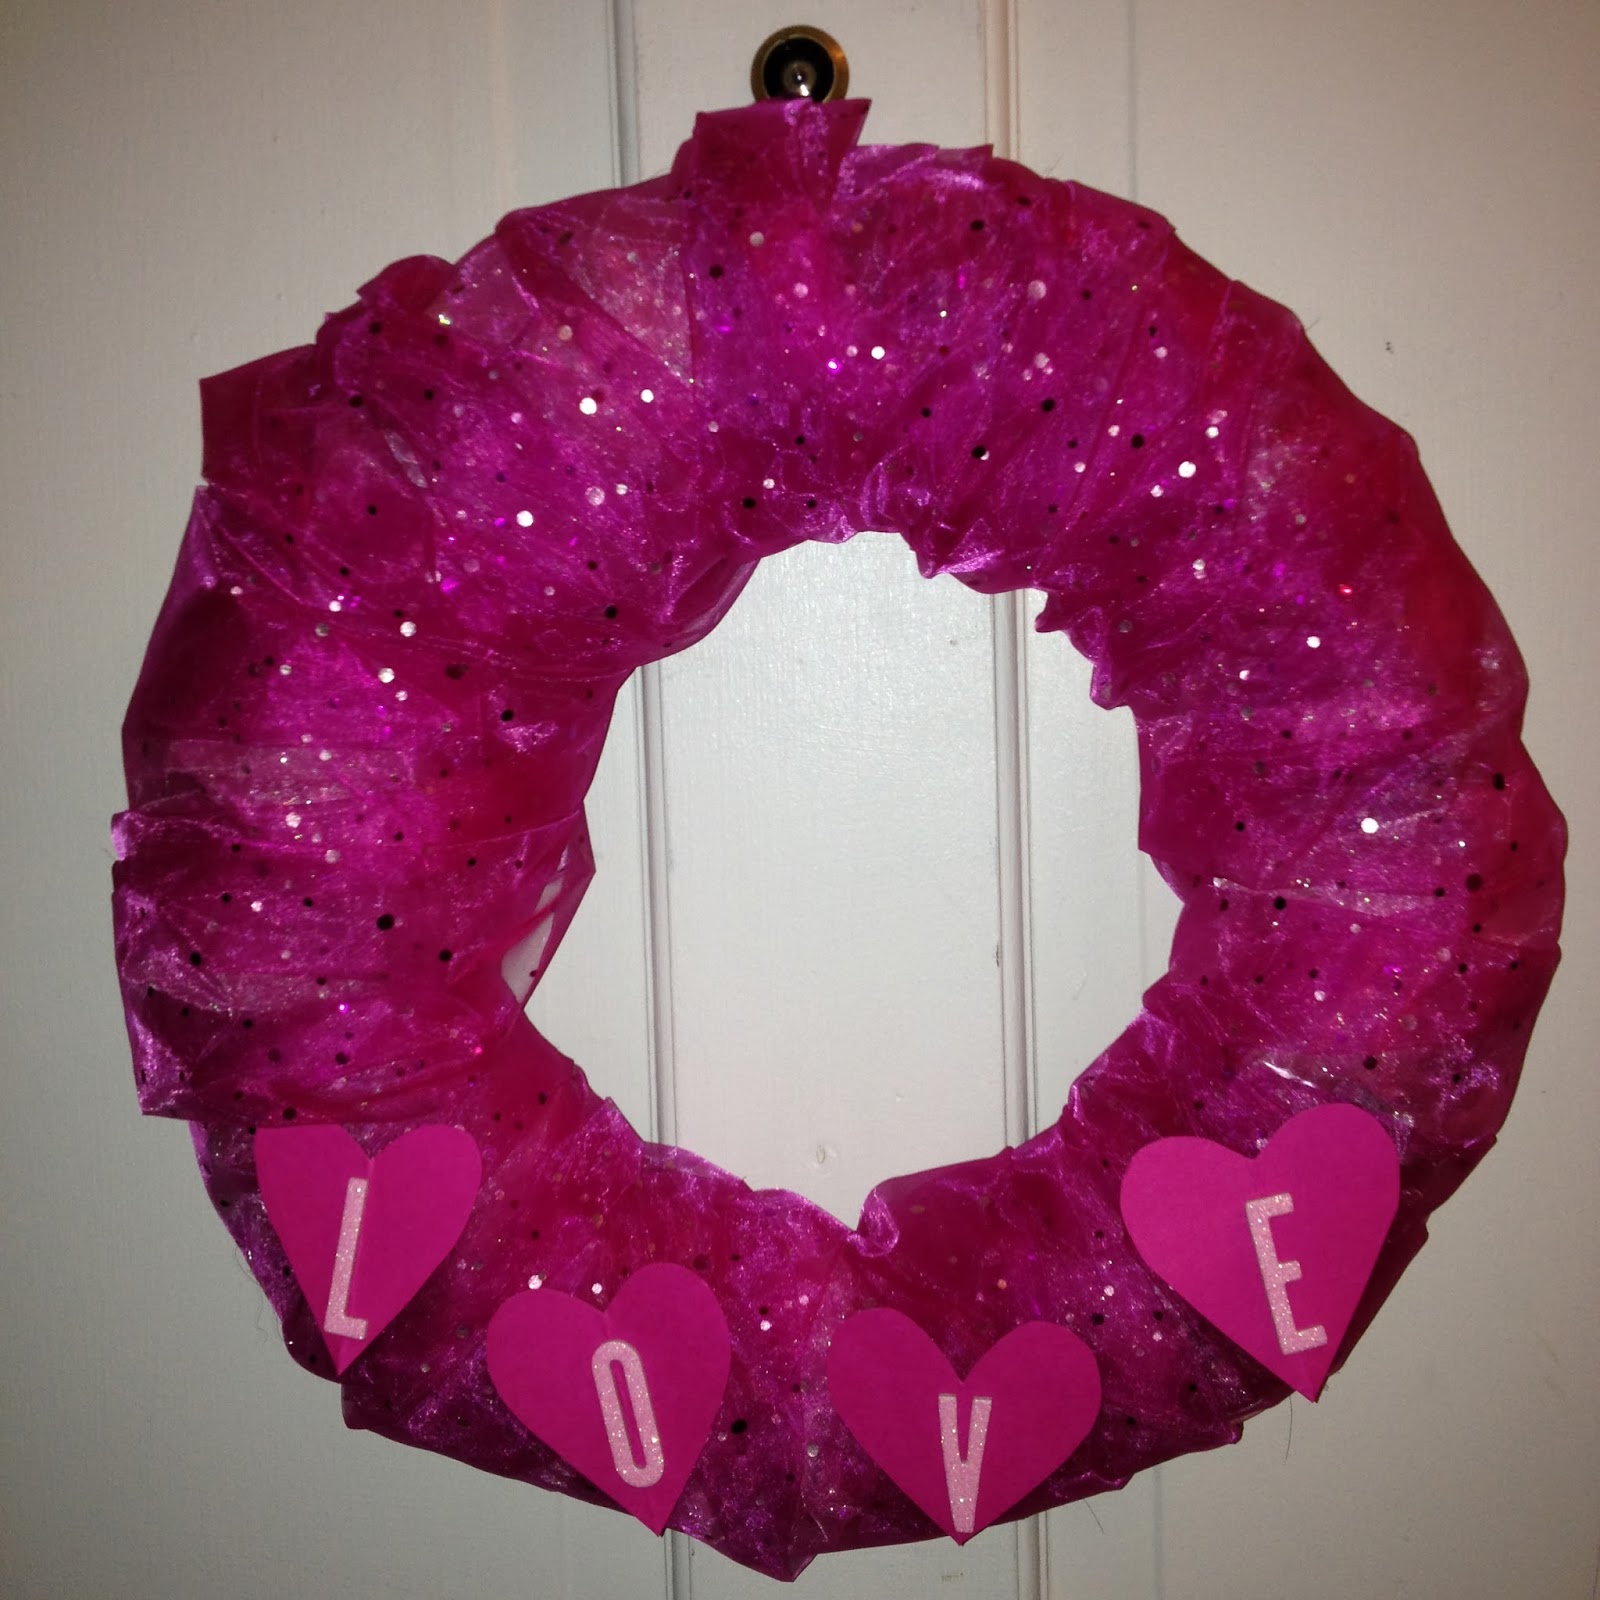
Valentine's Day Tulle Wreath

Valentine's Day will be here in just a few short hours!  Need a last minute decoration?  Check out this easy tulle wreath!  Or, try this style with the next holiday!


Supplies:
2-3 spools tulle (in the ribbon section at Hobby Lobby)
straw wreath form
hot glue gun and glue sticks
1 sheet scrapbooking paper
scrapbooking letters

Directions:
Loosely wrap the wreath with the tulle.  I used about 2 and 1/2 spools of tulle to continuously wrap the wreath to make sure the wreath was fluffy and light.  All ends should be hot glued on the back of the wreath.  I used a small piece of tulle to create a loop on the back for hanging.

Once the wreath is complete, cut four hearts out of your scrapbook paper.  Spell out L-O-V-E on the hearts and hot glue them onto the wreath.

Super easy and cute!  A versatile to boot!

2/12/2014

Plus Sign Quilt

Happy Wednesday!  Hope everyone has having a great week so far!

Last weekend, Troy spent most of Saturday away from the house giving me the opportunity to finish up a couple of quilts and make a new Valentine's Day wreath!  Tonight, I'm delighted to share with you my finished Plus Sign Quilt (check back tomorrow for the wreath!).

Specs:
196 blocks - 5 1/2 by 5 1/2
Finished size 70x70

So over the last couple of years I have acquired quite a few coordinating fat quarters and random end of bolts bundles that I decided would be perfect for a plus sign quilt.  I started out by cutting 196 5 1/2 by 5 1/2 inch blocks and then started organizing the into a plus sign pattern.  Once I got the main portion of the quilt laid out, I added the broken plus signs around the edges knowing I wanted to end up with 14 blocks across and down.  Next, sew the top and you're ready for quilting!  My mom graciously agreed to put this baby on her long arm and gave me lessons on running the machine.  I finally finished up the binding last weekend and its finally complete!


See you tomorrow to show off our Valentine's Day wreath!

2/09/2014

Red Velvet Chocolate Chip Cookies

Birthdays are a time for celebration.  Not just with family and friends, but with coworkers too.  Each month, we celebrate at least 2 birthdays, if not more!  To keep it fair, each person brings the birthday dessert for the birthday after their own.  My birthday girl loves red velvet cake.  Last year, I attempted my first cake of its kind.  This year, I decided to try something different: Red Velvet Cookies.  Oh my.  They were delicious!  Thank you Sally's Baking Addiction for such a fantastic recipe!

Ingredients:
3 cups + 2 tablespoons flour
1/2 cup unsweetened cocoa powder
1/2 teaspoon salt
2 teaspoon baking soda
1 cup unsalted butter, softened to room temperature
1 1/2 cup brown sugar
1/2 cup granulated sugar
2 eggs
2 tablespoons milk
4 teaspoons vanilla extract
4 teaspoons red food coloring - This is the approximate amount I ended up using.  They weren't really red, though, so twice as much may be necessary.
1 cup semi-sweet mini chocolate chips
1 cup semi-sweet chocolate chips, plus a few extra for topping

Directions:
Mix flour, cocoa powder, baking soda and salt in large bowl and set aside.

Beat butter in a stand mixer (or using a handheld mixer) until creamy.  Beat in brown and white sugar until combined.  Add eggs, milk and vanilla extract followed by the food coloring.  Once well combined, add dry ingredients.  Turn mixer on to slower speed and beat until soft dough is formed.  Add food coloring if you choose, then beat in chocolate chips.

Once dough is complete, cover your mixing bowl with foil and refrigerate for at least an hour. 

Next, preheat oven to 350 degrees.  Scoop 1 to 1 1/2 tablespoon of dough and mold into a ball.  Place balls on to cookie sheet covered with parchment paper with approximately an inch between each cookie.  The cookies will not spread a whole lot.  Bake for 10-11 minutes and remove from oven.

With a spoon, gently flatten the cookie to form a semi-crinkled cookie.  Add a few chocolate chips to the top of each cookie.  Let cool for 3-4 minutes on the cookie sheet before transferring to a cooling rack to cool completely.

These cookies were a total hit at the office!  And there were none left!  Hope you like them as much as I did!


2/08/2014

Breakfast Casserole

Hey, hey, hey!  Long time, no blog.  Bummer.  I hope you all have been doing well.  It's been a cold and snowy week here in Kansas.  So cold that my little dog who loves running up and down the fence on a normal day dreads going outside.  Springtime, where are you?

Due to the cold, venturing out for a weekend breakfast just isn't happening.  So how about making a breakfast casserole?  That's just what we did!

Ingredients:
1 cup cheddar cheese (you'll need extra if you want to top the casserole with cheese)
1 bag frozen O'Brien hash browns
1 pound turkey sausage
dash of pepper
8 eggs
3/4 cup milk
1/2 teaspoon salt
3/4 teaspoon dry mustard
1/2 cup turkey bacon bits

Directions:
Preheat the oven to 350 degrees.  While the oven is heating, brown the turkey sausage and drain.

Put hash browns in the bottom of a greased pan.  Layer with sausage and cheese.  In a separate bowl, mix eggs, milk and spices.  Pour egg mixture over meat and hash browns.  Top with bacon bits and cheese, if chosen.

Bake for 30 minutes.  Let stand for 10 minutes before serving.

Yum!

1/03/2014

Layered Buttermilk Biscuits

Growing up, one of my favorite foods my grandma made was biscuits.  Homemade buttermilk biscuits.  Flaky and fluffy and oh so delicious.  As Troy and I were preparing for Christmas breakfast with his family, I knew biscuits, muffins and a breakfast casserole would be the best dishes to serve.  I was pleasantly surprised by how easy the biscuits were to make and how delicious they were.  Enjoy!

Layered Buttermilk Biscuits
Adapted from MarthaStewart.com and Food.com

Ingredients:
4 cups all-purpose flour, plus more for dusting
1/2 teaspoon baking soda
2 tablespoons baking powder
2 teaspoons salt
12 tablespoons unsalted butter, very cold
2 cups buttermilk, plus more for brushing

Directions:
Preheat oven to 450 degrees.  

Combine the dry ingredients in a bowl.  Cut the butter into chunks and cut into the flour until the mixture resembles coarse crumbs.  Add buttermilk until just combined.  If the mixture appears to dry, add additional buttermilk.  The dough should be wet.

Turn the dough onto a floured board or clean counter top.  Gently pat (do not use a rolling pin) dough until its about an inch thick.  Fold the dough and press to an inch thick.  Repeat about 5 times.  

Use a round cutter or a floured glass to cut the dough into round biscuit shapes.  You can knead the scraps into biscuits as well.  Lay the biscuits close together on a cookie sheet.  Gently brush the tops of the biscuits with buttermilk.

Bake for 10-12 minutes or until the biscuits are golden brown.  


1/01/2014

Happy New Year! And Sweet Clementine Cranberry Muffins too!

Happy New Year to each of you!  I hope you all had a safe and happy celebration and enjoyed the first day of 2014!  We're in the homestretch to my sister-in-laws wedding and will be spending the next couple of days assisting in final preparations.  But - I still wanted to be sure to stop by and share a recent recipe with you!  Check is out!

Sweet Clementine Cranberry Muffins
Adapted from Blue Bonnets and Brownies

Ingredients:
2 sticks unsalted butter, melted
3 cups sugar
1/2 teaspoon salt
4 large eggs
2 teaspoons vanilla extract
4 2/3 cup flour
4 teaspoons baking powder
1/2 teaspoon nutmeg
2 teaspoons cinnamon
3 clementines, sectioned and chopped
1 5-oz package dried cranberries
1 cup buttermilk

Directions:
Preheat oven to 375 degrees.  Grease 2 standard muffin trays.

Melt butter and add to mixing bowl.  Add sugar, salt, eggs and vanilla and whisk briskly to combine.

In a separate bowl, combine flour, nutmeg, cinnamon, and baking powder.  Use a dry whisk to mix.  Pour mixture on top of butter mixture but do not stir.

Peal and chop clementines and mix with dried cranberries.  Add on top of flour mixture.  Fold the mixture together and few times until mixture is crumbly.  Be careful not to overmix.

Create a small dip in the mixture and add the buttermilk.  Gently fold until the buttermilk is absorbed into the dry mixture.

Fill your muffin cups to the top with the mixture.  Bake for approximately 27-30 minutes or until muffins are golden brown.  Remove from the pan and allow to cool.

Makes 24 muffins.  Store in airtight container.

These muffins are quite delicious!  They were a hit with the family when served on Christmas morning!  One thing to note, they are a little heavier than a "normal" muffin, but still taste great!  Enjoy!